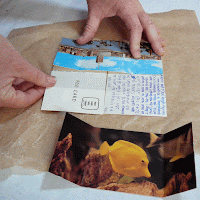
 Maybe you went on vacation and brought back picture postcards. Maybe you stayed home and a few people sent you picture postcards. Or maybe you just have a collection of them, like I do, that are overflowing their boxes. If you don't mind trimming and creasing them a bit, four of them can be used to make a cross flexagon. You could also use photographs or printouts on card stock.
 The first cross flexagon I ever saw was made by Ed Hutchins in 1999, and I am indebted to him for always sharing his processes. He has a whole page of flexagons on his website. Flexagons are a kind of revolving book, in this case a two-sided object is transformed into one with four faces. (I've included instructions for the cross flexagon and others in Chapter 6 of Making Handmade Books and just the square and tetra-tetra flexagon in Chapter 5 of Expressive Handmade Books.)
For this project, I recommend Tacky Glue, since it will stick to either the coated or uncoated sides of the postcards. PVA may work. Rub-on adhesive may work. Heavy gel medium will likely work. Glue stick will not work because it is not strong enough to withstand the flexing action. School glue will not work because it is too wet and will warp the cards. Tape is evil. Don't use tape.
 Tools: pencil; bone folder; metal ruler; X-Acto knife and spare blades; self-healing cutting mat; old magazines or catalogues or waxed paper to protect your work surface from the glue; small piece of board to spread the glue
 Materials: four postcards, all the same size (or trim to same size), landscape oriented (horizontal)

1. Mark and trim the postcards. The ratio of height to width needs to be 1:2. If your cards are 4" x 6", you'll need to trim them to 3" x 6"; if 150 mm wide, trim the height to 75 mm. I had some with blank backs and didn't mind too much from which side I trimmed, but if yours have stamps, you might want to trim the bottom edges.
2. Place the postcards in front of you, horizontally. Choose which sides will be facing up. (I liked gluing the backs together.) Measure and mark one quarter of the distance of the long side across each long edge, top and bottom. I found metric much easier for the math. If your postcards are 150 mm long, you would measure 37 mm along each edge toward the center, along both the tops and bottoms.
3. Align the ruler with the top and bottom marks. Press down the bone folder and draw with it, creating a score, connecting the two marks at each side of each postcard. Fold up along the scores.
4. Arrange two postcards face down and slightly apart, scores aligned. The corners here will never show again, so decide what is okay to hide. Apply glue in an "X" to each of the outer four corners (don't go past the scores). Use the piece of board to spread the glue evenly in a square area.
5. Turn one of the two remaining postcards so that it is face up, and press it into place crosswise, slightly over the edges of two of the corners.
6. Press the other postcard into place at the other two corners. There should be a slight gap between the two new postcards. It's okay if they stick out over the edges.
7. Press under weights, or if you are as impatient as I am, press down the glued corners with your fingers for a few minutes.
8. Use the X-Acto and the metal ruler to trim the edges evenly.
9. When the glue is dry, smooth out all the folds with the bone folder to tighten the creases.
TO FLEX:
To operate the flexagon, pull up and apart with your thumbs while pushing back and together with your fingers. You will need to rotate the flexagon 90º after each flex to get at the center cuts or flaps.
 |
| Pull up with the thumbs along the center cuts. (face #1) |
 |
| Flatten into a square. (face #2) |
 |
| Pull up at the center flaps. |
 |
| Flatten into a cross. (face #3) |
 |
| Pull up at the center flaps. |
 |
| Flatten into a square again. (face #4) |
 |
| Pull up at the center cuts. |
 |
| Here you are, back at the beginning square. (face #1) |


Comments
If you have four more postcards, trim and fold them the same way and you will find that you can glue them at the corners at the "back" in the same way.
Now you have eight postcards which can be opened in pairs as before.