Over the years I've had to make many teaching models, and I've ended up with maybe a dozen or so. Yet I'm not using them. Some take as long as six hours to make. Others just aren't quite right. And whenever I go on vacation I have to make a custom one for the occasion. In class, sometimes the students use them, sometimes they are afraid to write in them. As I'm preparing to teach a summer course called Letter by Letter: Letterpress Printing and Handwritten Text, I think I've come up with a quick and dirty journal that can be used without guilt to take notes, tack in examples with glue stick, and practice drawing letters. Since it isn't a bookmaking course, I wanted something that still felt the most traditionally booklike but was also easy to make. I also decided not to be bothered by glue, excess holes, uneven pages, and all the things I obsess about. I call it a Grunge Journal, but maybe it is really a Zen Journal. I felt calm making it.
If you purchase a pad of 60 lb. drawing paper, 100 sheets, 14x17, you can make TEN of these, which comes to under $2 each. I used some Stonehenge printmaking paper scraps for the covers, but you could use other found, thick paper. Even cereal boxes, if you so desire.
It is a hybrid of a multiple signature binding with five signatures (page 147 in Making Handmade Books: 100+ Bindings, Structures & Forms), a perfect binding (page 61), and a drum leaf softcover binding. The cover is also like a children's board book cover. It takes under an hour to make, depending on your weather, and includes glue drying.
I made two. One with Strathmore drawing paper, which turned out to be grained long, and one with Blick drawing paper, which turned out to be grained short. So, if you want a vertically oriented book, use the Strathmore. If you want a longer, horizontally oriented book, use the Blick. Whatever you do, please check the grain before you start. You'll need 10 pieces.

So here's the Blick drawing paper. Notice the buckling happen as I try to fold it: that means that I am folding against the grain. We start with a binder's fold. With this size paper and journal, you will first fold against the grain. The last fold ends with the grain so it will be parallel to the spine. (We could make a smaller book if we started with the grain and ended with the grain.)

Then make a slit along the fold, just past the center. This is a letter opener. A butter knife will work, too.

Fold in half again, this time with the grain. Put it aside for the moment and repeat the steps for the remaining nine sheets.

Pair and nest the sections so that you have five signatures.

Using a center-finding ruler or zero center ruler, mark for six holes in one section. Leave approximately 1/2" - 1" at head and tail. Looks like I have 1 1/2".

Using the marked section as a template, take an awl and poke the six holes in each signature. (I refold it so the marks are on the inside to make it easier.)

Sew a running stitch, as for multiple signatures. Use a bone folder to tighten the folds before you make any knots. Square knot after you've sewn two signatures, kettle stitch at the end of three, four, and five. (Details in MHB).


Clamp and glue on the fold. For a fancier book we would reinforce the spine with mull/super and mulberry paper.

When dry, slit open the rest of the uncut areas of the pages.

The cover needs to be [(2width of the book) + (depth of the spine) + (1/4")] x [height of the book + 1/4"]. For this horizontal book the book block was 8 1/2"w x 7"h x 3/8" d so the overall size should be 8 1/2 + 8 1/2 + 3/8 + 1/4= 17 5/8 x 7 1/4". Mine was 17 1/2 x 7 1/4". Because numbers.
Mark the cover top and bottom for the spine: 3/8" in the center, and 3/8" adjacent to it on one side. This measurement will be different for different inner papers, different amount of signatures, etc. Always measure first. Align the ruler and connect each set of marks by scoring with the bone folder.

Fold up: valley, valley, mountain.

Apply glue to the back cover at the edges, taking care to stay away from the folded sections. The spine and adjacent section need to remain free to move. Better (see gluing the front, below): measure 3/8" in on the back page and apply glue to the book block, then fit it into the cover.

Press the book block into place. Smooth out with a bone folder. Sandwich wax paper between the cover and the book block.
Open to the front. Put a waste sheet between the first page and the book block. Apply glue to three edges on the front: head, fore edge, tail (I feel a song coming on).

Remove the waste sheet, put waxed paper there instead. Press the cover down to the book block. Smooth out with a bone folder. Put under a heavy book to dry. Because of this paper, the pages still may buckle a little or be slightly wavy if they got damp.
This is the horizontal journal.


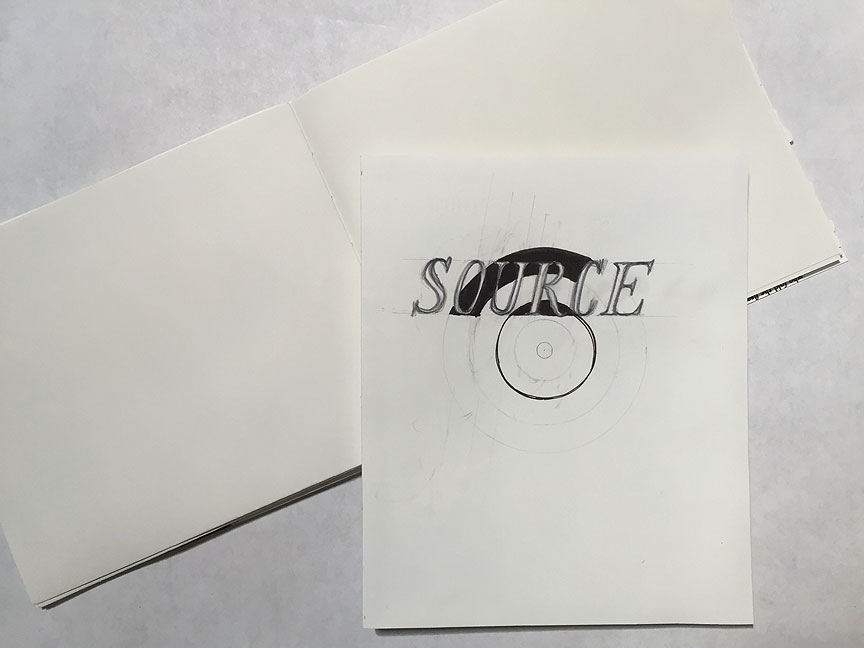
This is the vertical one, complete. I've already started using it.
If you purchase a pad of 60 lb. drawing paper, 100 sheets, 14x17, you can make TEN of these, which comes to under $2 each. I used some Stonehenge printmaking paper scraps for the covers, but you could use other found, thick paper. Even cereal boxes, if you so desire.
It is a hybrid of a multiple signature binding with five signatures (page 147 in Making Handmade Books: 100+ Bindings, Structures & Forms), a perfect binding (page 61), and a drum leaf softcover binding. The cover is also like a children's board book cover. It takes under an hour to make, depending on your weather, and includes glue drying.
I made two. One with Strathmore drawing paper, which turned out to be grained long, and one with Blick drawing paper, which turned out to be grained short. So, if you want a vertically oriented book, use the Strathmore. If you want a longer, horizontally oriented book, use the Blick. Whatever you do, please check the grain before you start. You'll need 10 pieces.
So here's the Blick drawing paper. Notice the buckling happen as I try to fold it: that means that I am folding against the grain. We start with a binder's fold. With this size paper and journal, you will first fold against the grain. The last fold ends with the grain so it will be parallel to the spine. (We could make a smaller book if we started with the grain and ended with the grain.)

Then make a slit along the fold, just past the center. This is a letter opener. A butter knife will work, too.

Fold in half again, this time with the grain. Put it aside for the moment and repeat the steps for the remaining nine sheets.

Pair and nest the sections so that you have five signatures.

Using a center-finding ruler or zero center ruler, mark for six holes in one section. Leave approximately 1/2" - 1" at head and tail. Looks like I have 1 1/2".

Using the marked section as a template, take an awl and poke the six holes in each signature. (I refold it so the marks are on the inside to make it easier.)

Sew a running stitch, as for multiple signatures. Use a bone folder to tighten the folds before you make any knots. Square knot after you've sewn two signatures, kettle stitch at the end of three, four, and five. (Details in MHB).


Clamp and glue on the fold. For a fancier book we would reinforce the spine with mull/super and mulberry paper.

When dry, slit open the rest of the uncut areas of the pages.

The cover needs to be [(2width of the book) + (depth of the spine) + (1/4")] x [height of the book + 1/4"]. For this horizontal book the book block was 8 1/2"w x 7"h x 3/8" d so the overall size should be 8 1/2 + 8 1/2 + 3/8 + 1/4= 17 5/8 x 7 1/4". Mine was 17 1/2 x 7 1/4". Because numbers.
Mark the cover top and bottom for the spine: 3/8" in the center, and 3/8" adjacent to it on one side. This measurement will be different for different inner papers, different amount of signatures, etc. Always measure first. Align the ruler and connect each set of marks by scoring with the bone folder.

Fold up: valley, valley, mountain.

Apply glue to the back cover at the edges, taking care to stay away from the folded sections. The spine and adjacent section need to remain free to move. Better (see gluing the front, below): measure 3/8" in on the back page and apply glue to the book block, then fit it into the cover.

Press the book block into place. Smooth out with a bone folder. Sandwich wax paper between the cover and the book block.
Open to the front. Put a waste sheet between the first page and the book block. Apply glue to three edges on the front: head, fore edge, tail (I feel a song coming on).

Remove the waste sheet, put waxed paper there instead. Press the cover down to the book block. Smooth out with a bone folder. Put under a heavy book to dry. Because of this paper, the pages still may buckle a little or be slightly wavy if they got damp.
This is the horizontal journal.


This is the vertical one, complete. I've already started using it.
Comments
Jeannie—I agree that companies should list the grain along with everything else! In this case, I should have taken the hint from how the pads were bound: the Blick pad was bound on the short edge, the Strathmore pad was bound on the long edge. That's probably a good first check, which I neglected to pay attention to, or I was just distracted at the difference in price between them…