Back in April I mentioned in this post that I had seen a terrific video at Bard Graduate Center of the making of a Coptic bound book with leather covers, endbands, and a clasp by Georgios Boudalis, and that I hoped to try this out. A few things fell into place, and I fell in with them.
The first was a technique I found that used painted and crinkled silk to create illusions of other materials, such as metal. It seemed entirely possible that one could make faux leather this way. Next month, I'll post how to make book cloth with this technique.
Well, okay, that was the main one. So I made some faux leather, and it was time to sew, but I had to go from memory. As with most models, I prepared materials for two books, approximately 4" wide and 6" high. For this size book, 4-ply museum board is perfect. The thinner 70 point book board is also fine. This book is super snug, so accuracy in cutting and measuring is even more important than usual. It is 1" thick and even though it is covered, it still opens completely flat.

Materials: (2) pieces book board, 4 1/8" x 6", grained long; (36-39) pieces 130 g/sqm Strathmore Drawing paper cut to 6" x 8", grained short (I cut them from a pad of 18x24"); 90" of unwaxed linen thread; (1) 8" x 11.25" book cloth; (2) endpapers, 3 7/8" x 5 3/4", grained long
Tools: pencil; metal ruler; awl; Japanese screw punch; curved needle; scissors; PVA; glue brush and paper plate; bone folder
These instructions assume you already understand basic bookbinding terms and techniques. For more detailed info, please see one of my instructional books.
1. On one book board, measure and mark: .25" from left; .75" from head and tail; and add three more marks for a total of 5 sewing stations. (The extra marks on this board, head and tail are to see where the endband holes will go. You don't really need them here.)


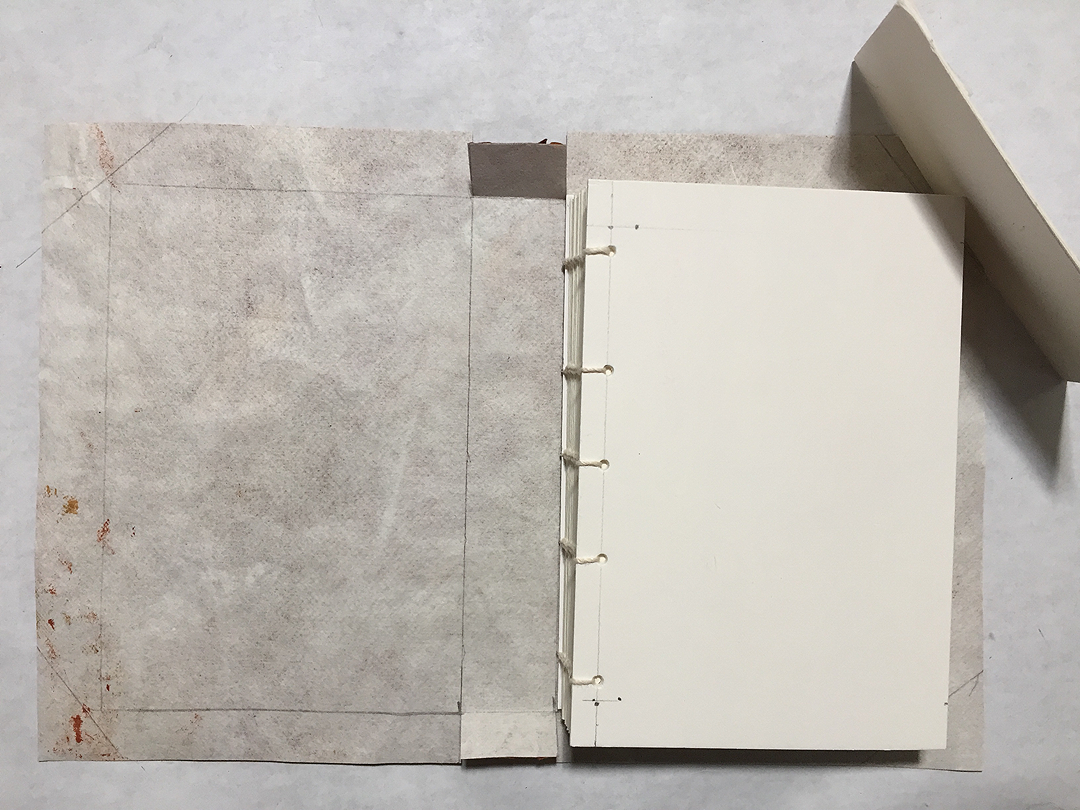
5. You can see the chain stitches on the three middle stations and a linked stitch at the ends. You won't see them once they are cased in.


The first was a technique I found that used painted and crinkled silk to create illusions of other materials, such as metal. It seemed entirely possible that one could make faux leather this way. Next month, I'll post how to make book cloth with this technique.
Well, okay, that was the main one. So I made some faux leather, and it was time to sew, but I had to go from memory. As with most models, I prepared materials for two books, approximately 4" wide and 6" high. For this size book, 4-ply museum board is perfect. The thinner 70 point book board is also fine. This book is super snug, so accuracy in cutting and measuring is even more important than usual. It is 1" thick and even though it is covered, it still opens completely flat.

Materials: (2) pieces book board, 4 1/8" x 6", grained long; (36-39) pieces 130 g/sqm Strathmore Drawing paper cut to 6" x 8", grained short (I cut them from a pad of 18x24"); 90" of unwaxed linen thread; (1) 8" x 11.25" book cloth; (2) endpapers, 3 7/8" x 5 3/4", grained long
Tools: pencil; metal ruler; awl; Japanese screw punch; curved needle; scissors; PVA; glue brush and paper plate; bone folder
These instructions assume you already understand basic bookbinding terms and techniques. For more detailed info, please see one of my instructional books.
1. On one book board, measure and mark: .25" from left; .75" from head and tail; and add three more marks for a total of 5 sewing stations. (The extra marks on this board, head and tail are to see where the endband holes will go. You don't really need them here.)

2. Use a screw punch with a 2mm bit and punch the holes. Fold all the papers in half and make 12-13 signatures with 3 folded papers nested in each.

3. Use these marks as a guide and measure and mark the five holes directly in the folds of one folded paper. With the one folded paper as a template, use it and the awl to punch holes in all the signatures. Put the template back into its signature and stack up the 12-13 signatures, sandwiched with the book boards.

4. See instructions for Coptic Stitch/Curved Needle in Making Handmade Books for complete sewing details. I think stitching with a curved needle goes a little faster than the paired-needle binding, but it still takes about 40-60 minutes to sew this many signatures.

5. You can see the chain stitches on the three middle stations and a linked stitch at the ends. You won't see them once they are cased in.

6. Prepare the book cloth. Place the closed book on the wrong side of the cloth and draw around one cover, leaving a one-inch margin at edge and head and tail. Measure one inch plus two board thicknesses between the larger rectangles. Cut flaps at the spine.

7. Draw a line at the corners, using a piece of book board as a guide.
8. Apply glue to the tabs and paste down, making sure you don't paste them shorter than the boards. A tiny bit longer is okay.

9. Glue down the back board. Then apply glue to the outer flaps and turn them in. Remember to pinch and tuck in at the corners.


10. Repeat for the front board.


11. One at a time, apply glue to the endpapers, center them head and tail, but align with inner edge of the board and press down. Place waxed paper between the cover and the book block and put under a heavy book for a few hours or overnight. You could stop here, if you like.

A historically accurate version of this book would not have had endpapers, but this isn't exactly that. I did add the sewn endbands. That post, next time.


Comments