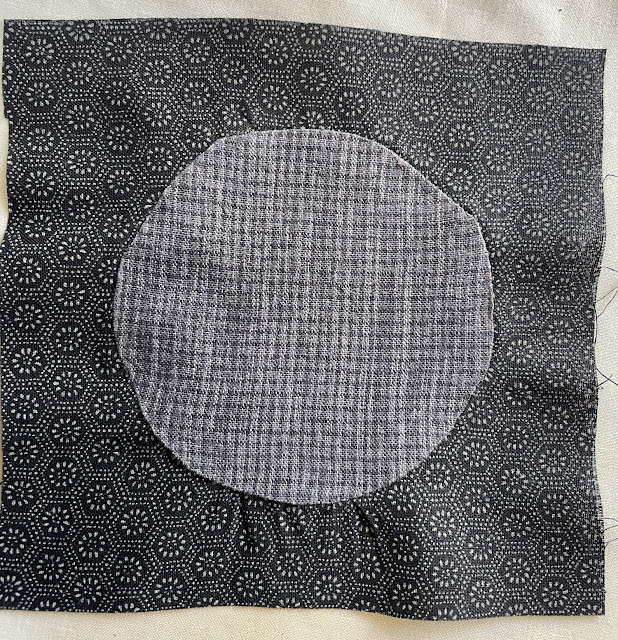
My sister asked if I would make a cover for their turntable. "Knock yourself out," she said (at least that is what I remember). As usual, I thought about the connection between content and form and came to the conclusion that the project needed to have circles to evoke LPs. I could have made circles by a simple stitch-on, raw-appliqué process. I could have made circles with reverse appliqué. I could have made circles by clamping cloth between two tin can lids and dyeing the fabric. But I wanted to learn something new, and I really wanted it to look like this, so I took on the challenge of piecing a circle in a square.
I must start by saying that this is hard. It took time. One patch took me 30-40 minutes. I sewed at least a dozen before I was even close to making one look right. And by right I mean with no cloth bunching up. Or maybe a tiny bit. Not perfect. There are many good tutorial videos online but the little details they mention only become obvious as you yourself are sewing around that circle. I had to figure out the adjustments as I went along.
1. The cutout in the square and the circle cutout to be pieced in are different sizes: the background square's hole is ONE INCH smaller than the circle to be pieced inside it.
The videos say, "choose a size circle you want, then add one half inch to the main circle and subtract one half inch from the background circle." This allows for a 1/4" seam.
Tools: sewing machine, pins, fabric marking pencil (white for dark fabric, regular pencil okay for lighter fabrics because it will not show in finished piece), 2 circles, one an inch larger than the other (storebought templates, or homemade paper ones), seam ripper or tweezers, spray bottle, iron, ironing board
Materials: cotton fabric, thread
2. I wanted 4" circles, which are kind of small. I suspect I would have had an easier time with larger circles, perhaps more like 6". I created a pattern in a drawing program (Affinity Designer) for a 4.5" circle and a 3.4" circle and printed it out. I originally made a 3.5" circle, but found the cloth kept bunching up on the outside. I don't know if that tenth of an inch was because of how it printed out or I wasn't cutting exactly or what, but ultimately it made a difference.
3. I cut out the paper circles and folded the larger one in half and the smaller one in half both ways to make equal quarters, then opened them. I would use these folds when I cut out the cloth.
4. I trimmed the background fabric pieces to 6" squares, (2" larger than my desired 4" circle). I could have used more margin, but I saw that three circles in a row would fit the project.
5. I finger pressed the squares in half both ways and diagonal both ways so I had 4 folds/8 sections.
6. I folded the square in half and sandwiched it with the smaller circle, aligning two of the folds. Pinned the half circle down.
7. Pinching the paper circle at the edge and rotating the cloth as I cut, I carefully trimmed out the background circle. Removed the pin. Opened it up. Marked the folds at the circle edges with a white pencil (dark cloth).
8. Folded a piece of cloth in half and sandwiched the larger paper circle around it. Pinned it. Pinched the paper and carefully cut out the main circle by rotating the cloth as I cut.
9. Finger pressed the circle in half, in half again, lined up the folds to fold "diagonally" and the other way as well. These now matched the folds of the background.
10. With the right sides of the cloth together, matched up the marks and pinned the circle into the background with the pins on the background side. Pinned one set of marks, then pinned the one set across from it. In the end It looked like a little cup.
11. I used the symmetrical presser foot, but kept the needle to the left to give me the quarter inch margin when stitching. With the circle down, I started sewing just after a pin, making sure both fabrics were flat for 1-5 stitches. Okay, changing into instructional language now.
12. Pick up the presser foot. Make sure the fabrics are still aligned and smooth out the fabric to the side and just in front of the needle. Use your finger to smooth out the fabric; a seam ripper or tweezers is a helpful tool to hold the edges in place until you lower the presser foot.
13. Lower the presser foot and sew 3-5 stitches.
14. Keep picking up the presser foot, pulling the fabrics to align them, and smoothing the way for the needle until you get all the way around. This took me 25 minutes.
15. Spray the patch with water, front and back.
16. Iron out the seams around the circle.
17. Flip the patch over and iron out the circle/background. You may need to do this a few times, wetting, stretching, and blocking the patch to get out any creases. There still may be a couple wrinkles. Yeah, there are two little tucks in this one.
18. For all of them the edges were a little wonky, so I trimmed the 6" squares down to 5 1/2".
The main thing I learned was that the cutting must be exact, the seam allowance must be exact. And above all, to take it slowly. Very, very slowly.
And so, a turntable cover was born. Actually, two. One for us as well. I call them "The Platters."


Comments